If you are looking for an easy way to self-host n8n, then look no further than installing in on a DigitalOcean droplet.
DigitalOcean is an infrastructure provider that simplifies cloud computing for developers, startups, and small to medium-sized businesses (SMBs). It operates 15 data centres worldwide, offering services such as virtual private servers (VPS), known as “droplets,” managed databases, Kubernetes-based container orchestration, and scalable storage solutions.
DigitalOcean focuses on delivering a user-friendly experience with predictable pricing, making it an appealing alternative to larger cloud providers for those seeking simplicity and affordability.
This means that you can easily spin-up a DigitalOcean droplet and install n8n with just a few commands.
Here is how to install n8n on a Digital Ocean droplet.
Create a Droplet
If you don’t have one already, create a DigitalOcean account. Click here to create your account using our referral link and get a $200 credit that lasts 60-days. Enough to get you up and running and give n8n a spin.
Once logged in, click the green Create button at the top of the screen and select Droplets from the dropdown menu. That’s the first option in the list.
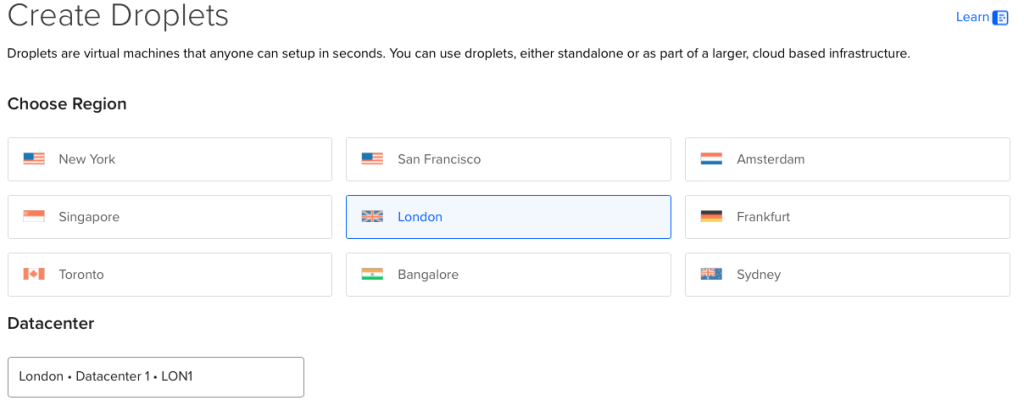
Next, select a location where to host your Droplet. Best to pick a location near to you.

Now, scroll down to the Choose an image section. Select Ubuntu and a version in the dropdown. There are probably already selected for you.

Next, in the Choose Size section select Basic (under the Shared CPU option). In CPU options, select Regular and select the 1GB/1CPU, 25GB SSD Disk, 1000GB transfer option. At the time of writing, this is the $6/mo option.

We’ve created 100’s of incredibly complex workflows on this size of droplet and it’s never flickered. If you do outgrow this though, you can easily upgrade.
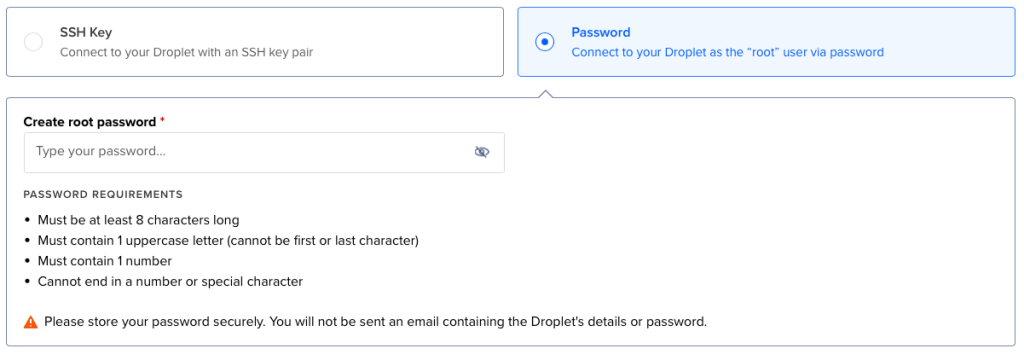
Now, scroll down to the Choose an Authentication Method section. If you are familiar with SSH’ing into a server, then you can choose the option that you prepared. If that last statement makes no sense to you at all, don’t worry, it doesn’t really matter as the way we are going to approach this means we don’t need to log into the server using any additional software. SSH Key is the most secure though.

If you choose SSH Key, you will need to generate one of these. You can do this on the WPOven website. Add a password into the box (you will need to remember this) and click the Create Key button. Once created, head back to the DigitalOcean dashboard and click the blue New SSH Key button. Is the popup, copy the contents of the Public Key from WPOven into the window. Then, give it a name. This makes it easy to remember and use again if needed.
Click the Add SSH Key button to create the key.
If you chose to use Password, rather than SSH Key, create a password that matches the criteria below the password field.

Now, scroll to the Finalize Details section. In the Hostname field, you can either leave what is there, or remove it and replace it with something of your choice i.e. n8n-server.

Finally, at the bottom of the screen, click the Create Droplet button.
The droplet will then spin-up and you will be given an IP address.
You will need to create a new A Record in your DNS records that points to this – for example n8n.yourdomainname.com.
How you do this will depend on your domain registrar. This article from HubSpot provides some basic instructions for the main domain registrars.
That’s it for creating a DigitalOcean droplet, now onto installing n8n.
Installing n8n
To install n8n on your newly created DigitalOcean droplet you will need to SSH into the server.
If you have no idea what that means – fear not. Click the droplet hostname to open the droplet details. Then at the end of the details row, click the console button. This will open a back coloured window. This is where we will type in the commands needed to install n8n.
If you are new to this, just copy and paste the below commands into the terminal window one-by-one. When you have pasted the command, just hit enter on your keyboard to execute.
Make sure each command has finished running before you add the next. You will know it finishes when it returns back to the prompt you started at before pasting the command.
n8n requires a few things installed first. It requires Docker, Docker Compose and Caddy. Docker and Compose makes it easier to manage n8n in future, for example when it needs upgrading. Caddy allows n8n to be served in a web browser.
Let’s start with these two things first.
Installing Docker, Docker Compose and Caddy.
Copy and paste the following commands one at a time:
Let us first ensure that all of the software on the server is up-to-date:
sudo apt update && sudo apt upgrade -yNow we’ve done that, we can move on with the main part of the installation and get the files needed:
sudo apt install apt-transport-https ca-certificates curl software-properties-common -yThen:
curl -fsSL https://download.docker.com/linux/ubuntu/gpg | sudo gpg --dearmor -o /usr/share/keyrings/docker-archive-keyring.gpgAnd then
echo "deb [arch=$(dpkg --print-architecture) signed-by=/usr/share/keyrings/docker-archive-keyring.gpg] https://download.docker.com/linux/ubuntu $(lsb_release -cs) stable" | sudo tee /etc/apt/sources.list.d/docker.list > /dev/nullNow, we need to update the server again:
sudo apt updateNext, we install Docker
sudo apt install docker-ce docker-ce-cli containerd.io -yOnce this command completes, we can check in installed OK by running this command:
sudo docker --versionYou should see this return a Docker Version. If you do, we’re good to move on to installing Docker Compose.
Run this command to download Docker Compose:
sudo curl -L "https://github.com/docker/compose/releases/latest/download/docker-compose-$(uname -s)-$(uname -m)" -o /usr/local/bin/docker-composeThen:
sudo chmod +x /usr/local/bin/docker-composeAnd check it installed by running:
docker-compose --versionLike before, if everything is OK, this should return a Docker Compose version. If you do, then we can move on.
Run the following two commands to enable and start docker:
sudo systemctl enable dockerThen
sudo systemctl start dockerThat’s Docker and Docker Compose taken care of, now onto Caddy and n8n.
Installing Caddy and n8n
Before we move on, we are going to change to a different directory. Run this command:
cd /homeThe we can download the configuration files. Run this command:
git clone https://github.com/n8n-io/n8n-docker-caddy.gitNow we need to move to another directory that the last command created: Run this command:
cd n8n-docker-caddyYou should now see the prompt has changed to show n8n-docker-caddy.
Next, we need to create two new directories to hold some of the data n8n needs. Run this command:
sudo docker volume create caddy_dataAnd then:
sudo docker volume create n8n_dataPerfect. Now we need to open up some ports in the firewall to allow n8n to work in the browser. Run these two commands:
sudo ufw allow 80And then:
sudo ufw allow 443OK, if you are new to this, this is probably the most complex part. We need to add some details to the configuration files. We do this using a text editor called Nano.
Run this command:
nano .envYou will see the terminal window changes. It’s now showing you a file. You will need to use the arrow keys on your keyboard to move around the file.
You can use the tool further down the page to help with generating/checking the content of the two files mentioned below.
The first thing we need to change is the DATA_FOLDER setting. It will currently show:
DATA_FOLDER=/<directory-path>/n8n-docker-caddy
We need to change this to:
DATA_FOLDER=/home/n8n-docker-caddy
That’s because we installed the files in that directory earlier.
Next, we need to change the DOMAIN_NAME and SUBDOMAIN.
This relates to the A Record you created earlier in the article. Lets say your domain for n8n is going to be demo.autom8this.com, then your file will need to look like this:
DOMAIN_NAME=autom8this.com
SUBDOMAIN=demo
This means we replace example.com with autom8this.com and n8n with demo.
Remember, this is just an example. You will need to add your own domain name.
Then, set the GENERIC_TIMEZONE.
It will currently look like GENERIC_TIMEZOME=Europe/Berlin.
You should change this to your local timezone. You can see a list of timezones to use here.
Finally, change the SSL_EMAIL to your email address, replacing example@example.com.
Once you are happy, press Control and x on you keyboard together to exit the editor. You will see Save modified buffer? at the bottom of the window. Press Y on your keyboard. You will then see File Name to Write: .env. Press Enter on your keyboard.
That’s the .env file taken care of. Next, we need to make a change to the Caddyfile.
Run the command:
nano caddy_config/CaddyfileThis opens the CaddyFile.
In this file, we need to replace the domain at the top. This should currently read
n8n.<domain>.<suffix>
We need to remove this and add our own domain again, so in my example it would be demo.auto8this.com
Make sure to leave a space between your domain and the { curly bracket.
Once you are happy, press Control and x on you keyboard together to exit the editor. You will see Save modified buffer? at the bottom of the window. Press Y on your keyboard. You will then see File Name to Write: .caddy_config/Caddyfile. Press Enter on your keyboard.
That’s the Caddyfile taken care of and all of the configuration changes we need to make.
You can use the tool below to generate/check the contents of your 2 files:
Now, we can start up n8n.
Run this command:
sudo docker compose up -dThis will take a few minutes to complete. Once done, you can head to the domain name you created and you should see n8n.
Create a User Account
Fill in the details to create your account. Once complete, you are ready to start using n8n.
Enjoy!

